


Today we will see how to create a View based application from scratch starting with a Window based application. Now one would ask when Xcode gives us a template to create a View Based Application, why create one from scratch. We should do this because a new iPhone developer should know how the template code is created so that he can understand what is going on behind the scene in the code and files created by the template. This improved understanding will allow you to customize the template as needed. Also this knowledge will help you when you would want to create a Navigation Controller Based or Tab Controller Based Application from scratch. (Yes there will be tutorials for those too, so stay tunes to our blog!) The code created by those templates is not easy to follow and modify, so I always prefer to create them from scratch.
Start Xcode and choose a Window based application with name as ViewBased.
-
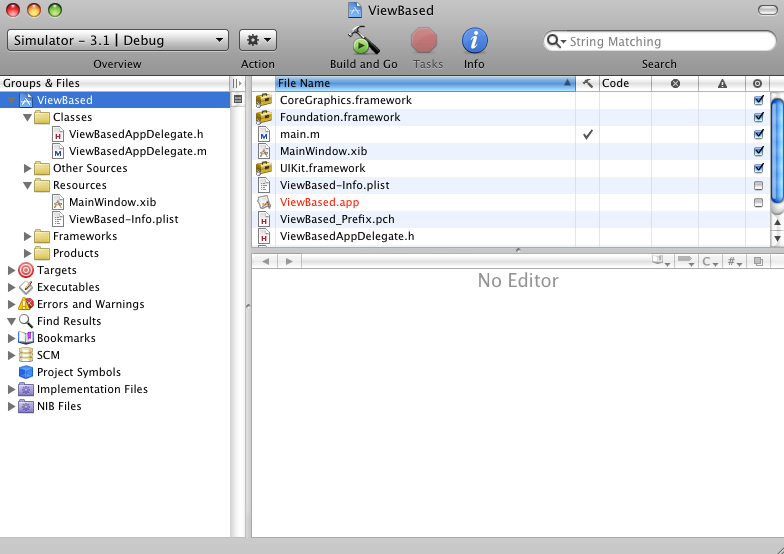

- ViewBased Application Window

In Group & Files Panel (left side of above image) there is the Classes group which Contains 2 Delegate Files(.h or header and .m or implementation) are present. Every iPhone application will have one and only one object of type UIApplicationDelegate.
While creating Cocoa based programs you will hear the word delegate used quite often. Delegate is a software design pattern. To quote, iPhone Application Programming Guide :
Delegation is a mechanism used to avoid subclassing complex UIKit objects, such as the default UIApplication object. Instead of subclassing and overriding methods, you use the complex object unmodified and put your custom code in side the delegate object. As interesting events occur, the complex objects ends messages to your delegate object. You can use these hooks‚ to execute your custom code and implement the behavior you need.
ViewBasedAppDelegate is the name of our application delegate. Here (Viewbased+AppDelegate) ViewBased is the name of iPhone application. And AppDelgate indicates that it is derived from UIApplicationDelegate. UIApplicationDelegate is a protocol (ie interface in C# or Java) which gives you access to two important events in iPhone Application life cycle:
1. applicationDidFinishLaunching
This method gets called immediately after the application launches. As the name suggests one can implement this method to perform some initialization for the application.
2. applicationWillTerminate
This method is called just before the application is terminated or killed. Overriding this method will help to save any unsaved data before the application is terminated or killed.
Now right click on Classes group Add-New Files. You should get following dialog:
-
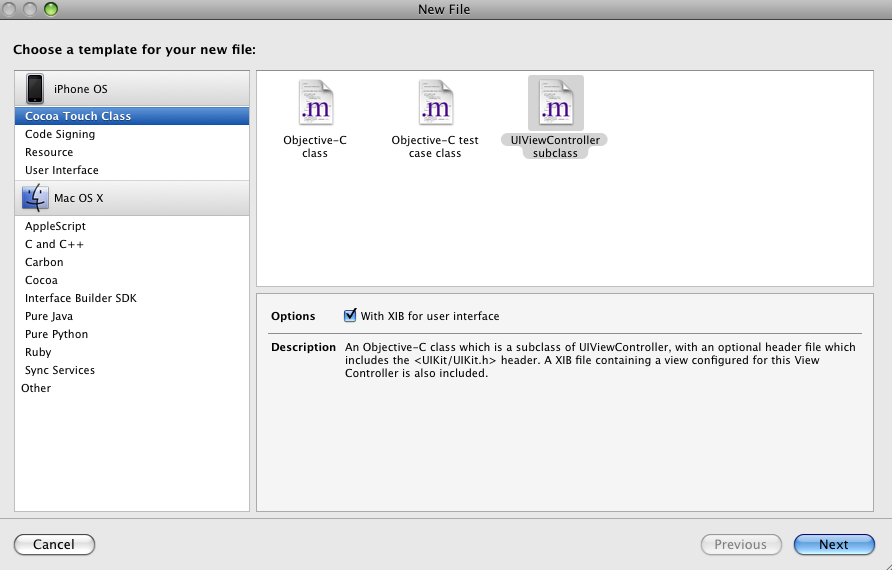
- Add New File: New View Controller

There are quite a few file types present for now just select Cocoa Touch Class From iPhone OS pane.
Cocoa Touch is one of the frameworks we use for iPhone development. Now select UIViewController subclass also tick on With XIB user interface. Click next and give name ViewOne and Click on Finished.
Now Drag n Drop ViewOne.xib from Class Folder to Resources folder as all .xib files lie there only.
Add the lines 5 and 9 from the following code to ViewBasedAppDelegate.h File
#import @class ViewOne; @interface ViewBasedAppDelegate : NSObject { UIWindow *window; ViewOne *viewOne; } @property (nonatomic, retain) IBOutlet UIWindow *window; @property (nonatomic,retain)IBOutlet ViewOne *viewOne; @endIn above code @class is used to forward declaration of ViewOne. @property and @synthesize is used as getters and setter (or can say accessors and mutators).
Now Add the lines 7, 12 and 17 from the following code to ViewBasedAppDelegate.m File
#import "ViewBasedAppDelegate.h" #import "ViewOne.h" @implementation ViewBasedAppDelegate @synthesize window; @synthesize viewOne; - (void)applicationDidFinishLaunching:(UIApplication *)application { // Override point for customization after application launch [window addSubview:viewOne.view]; [window makeKeyAndVisible]; } - (void)dealloc { [viewOne release]; [window release]; [super dealloc]; } @endIn above code applicationDidFinishLaunching: method will be called when your application just finishes its launching process. Using addSubview: method we add view inside the window. Then we make this window visible using makeKeyAndVisible.
In dealloc method we are deallocating memory for all objects that we have allocated/retained. Like viewOne, window etc.
Here make sure that you save (command + S) and build (command + B) the project. Otherwise sometimes interface builder won’t pick the outlets you just created.
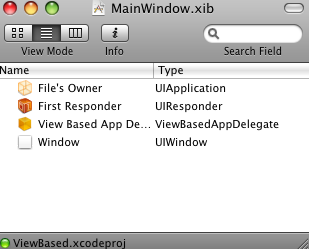
Now double click on MainWindow.xib in Resources Group
- MainWindow.xib
There are four Objects in MainWindow.xib. They are
File’s Owner,First Responder, View Based App Delgate and Window.The File’s Owner is one of the most important objects in a nib file. Because it provides link between application code and content of .xib file. Actually it is controller object in .xib.
View Based App Delegate is subclass of UIApplicationdelgate.
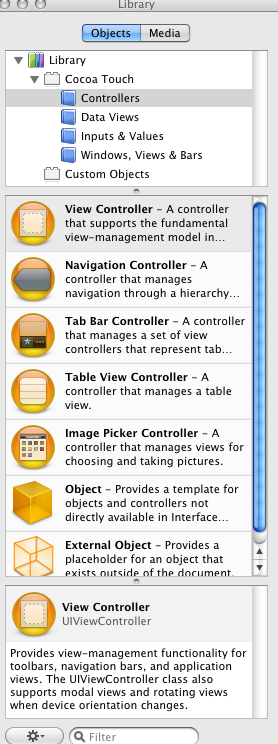
- Library
Generally every iPhone application will have only one AppDelegate file and one main window.
Now open Library from tools menu
(shift +command + L)Add View Controller to window from library by drag n drop to MainWindow.xib. Please note that we are dragging the view controller on the window titled MainWindow.xib and not on the window title window. A new window will be created with view on it.
Now open Identity Inspector(command +4) and select view in MainWindow.xib
Change class name to Viewone.
Notice that View Controller changes to Viewone in mainwindow.xib. Select View Based App Delagate and open Connection Inspector (command +2) make connection with viewone as shown.
Go back to Xcode and double click on Viewone.xib. Open identity Inspector(command+1) change the background color.
Now save the changes. Goto xcode save the project (command+s) and build and rum your project.
At this point you have created a complete view based application from scratch starting from a window based application.
You can download the source code used in this tutorial from here : ViewBased Application
Update:
Hey thanks Alan for your thoughtful comments. I have updated the post accordingly. I really appreciate the time and effort you put in to make the tutorial better for the future readers.